This is usually written for those who have changed their WordPress domain to a new domain name.
There are a few versions of this similar rule or code via .htaccess to redirect old domain posts to new domain posts available from the Internet.
I have tried them out, and as for me this one works perfectly well.
404 Not Found Redirect Old Domain URLs
Even thought they have set the 301 redirects, yet they still cannot get those URLs with old domain to redirect properly.
For example:
http://olddomain/blog-post-title/
redirects to
http://newdomain/blog-post-title/
What they get is a 404 Not Found page.
Redirect Old Domain URLs To New Domain URLs Via .htaccess
Here is how I redirected blog posts with old domain to their respective blog posts with new domain using a .htaccess file.
Note: You DO NOT paste the redirect code (as provided below) in the existing .htaccess file of your WordPress site.
You need to create a NEW folder to store the NEW .htaccess file.
This new .htaccess file is where you paste the redirect code.
This what you do.
1. Log in to your cPanel.
2. Click the "File Manager".
3. You can see the home directory at the left side of the page.
4. It looks like this: (/home/(your user name)
Note: That's why home directory is also called login directory.
5. In fact this is the page you want to create a new folder(blue color).
6. Click on "+ Folder" which is at the top left hand corner.
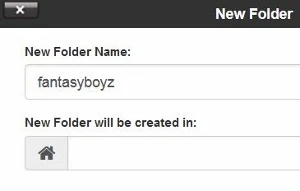
7. A box pops up.
8. For "New Folder Name:", enter the name of your old domain.
9. For the "New Folder will be created in:", leave it blank.
10. Then click on "Create New Folder" button.
11. Now immediately you can see your newly-created blue color folder on the right side of the page.
Create .htaccess File
12. After you have created the folder, let's create the new .htaccess file INSIDE this folder.
13. Double click on this newly-created blue color folder.
14. It will see "The directory is empty".
15. Now click on "+ File" at the top left hand corner.
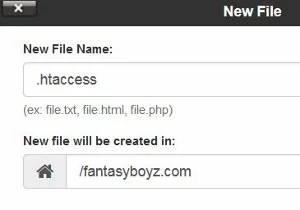
16. A box pops up.
17. For "New File Name", enter htaccess
18. Then click on the "Create New File" button.
19. Immediately you can see the newly created htaccess file.
20. Right click on the word "htaccess", a menu pops up.
21. Click on either "Edit" or "Code Edit".
22. Another box pops up. Click on the "Edit" button.
23. Now it will open an empty page.
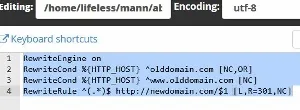
24. Paste this code in the empty space next to the digit number 1.
RewriteEngine on
RewriteCond %{HTTP_HOST} ^olddomain.com [NC,OR]
RewriteCond %{HTTP_HOST} ^www.olddomain.com [NC]
RewriteRule ^(.*)$ http://newdomain.com/$1 [L,R=301,NC]
25. Finally click on the blue color "Save Changes" button on top right hand corner.RewriteCond %{HTTP_HOST} ^olddomain.com [NC,OR]
RewriteCond %{HTTP_HOST} ^www.olddomain.com [NC]
RewriteRule ^(.*)$ http://newdomain.com/$1 [L,R=301,NC]
26. Then click on the "Close" button.
That's all.
If you do it correctly, now all your existing old domain URLS blog posts should instantly redirect correctly to the same blog posts with the new domain.
No more 404 Not Found remark.


